Embarking on a renovation project or addressing an issue beneath your floor tiles? In either case, you’ll need to remove those tiles first. This How To Remove Floor Tiles Guide delves into two distinct methods for floor tile removal: the hands-on, manual approach and the more efficient ride-on powered floor scraper.
Whether you’re a DIY enthusiast or a seasoned professional, these techniques will help you tackle your tile removal project with confidence. Read on to explore both methods and learn how to remove floor tiles efficiently and effectively.
Several Reasons for Removing Home or Office Floor Tiles
To replace the tiles with new ones: If the tiles are old or damaged, they may need to be replaced with new ones.
To change the style or colour of the tiles: If the tiles are not to the homeowner’s taste, they may want to remove them and install new tiles that better match their new decor.
To repair or replace the subfloor: If the subfloor beneath the tiles is damaged, it may be necessary to remove the tiles in order to make repairs or to replace the subfloor.
To install a different type of flooring: If the homeowner wants to change the type of flooring in the room, such as from tiles to hardwood or carpet, they may need to remove the tiles first to create an optimal surface for the new flooring to be installed.
To remove tiles that were installed improperly: If the tiles were not installed correctly the first time around they may need to be removed and reinstalled in order to correct any issues such as leaks or crooked tiles.
Mastering Floor Tile Removal
With so many different methods and tools available, removing old floor tiles can get tricky if you’re looking for how to remove floor tile the best way for your project.
The method you choose will depend on the tools available to you, as well as the type of tile and adhesive being removed.
To help you make an informed decision, we’ve outlined the pros and cons of both manual and powered tile removal and take you step-by-step through each tile removal method.
But first, are you going wet or dry?
Wet Vs. Dry Floor Tile Removal
Wet tile removal uses water to soften tile adhesive. This method minimizes dust.
Dry tile removal uses mechanical force that breaks floor tiles and the adhesive without soaking in water first. Both wet and dry tile removal can be done manually or with a floor removal machine such as the Janser ADB Ride On Floor Scraper.
Choosing Your Method: Manual vs. Powered Floor Tile Removal
When it comes to removing floor tiles, there are two main options available to you: manual and powered removal.
Manual tile removal involves using tools such as hammers, chisels, and scrapers to break up the tiles and adhesive. This method is ideal for small-scale projects or for those who are working with a limited budget. On the other hand, powered tile removal involves using specialized tools such as electric floor scrapers, which can speed up the process and make it easier for larger projects. Whether you choose manual or powered removal, it’s important to have the right tools and safety gear to get the job done safely and efficiently.
How To Manually Remove Floor Tiles
This method involves breaking up the tiles with a chisel and hammer and then using a pry bar to lift and remove the tiles or an air electric jackhammer. It is suitable for small areas or for removing tiles from tight or hard-to-reach spaces such as stairs or powder rooms and is less expensive than purchasing or hiring a ride on machine.
KEVMOR TRADESMAN’S TIP If you are completing a large project it is important to weigh up the labor hours required to perform manual tile removal and how many people you would need, versus hiring or purchasing a ride on floor scraper.
Advantages of Manual Tile Removal
Manual tile removal is a cost-effective and precise method for removing tiles, especially in small areas or in tight and hard-to-reach spaces. Using tools such as a chisel, hammer, and pry bar or jackhammer. Although labor intensive, manual tile removal is suitable for small areas like a bathroom or kitchen and usually done in residential settings as machine-based tile removal is not practical.
5 Advantages Of Using A Manual Tile Removal Methods:
Cost-effective: Manual tile removal is far less expensive than using a machine to remove tiles as it does not require the purchase or rental of specialised equipment.
Control: Manual tile removal allows you to have more control over the removal process as you can manually guide the chisel or jackhammer and adjust the pressure as needed.
Suitable for small areas: Manual tile removal is well-suited for small areas or for removing tiles from tight or hard-to-reach spaces, as tile removal machines are very large and bulky.
Precision: Manual tile removal allows for greater precision as you can take your time to carefully remove tiles without worrying about damaging the subfloor or surrounding walls, floor, drains or where the tiles join another flooring type.
Safety: Manual tile removal produces less dust and debris than machine-assisted methods, making it a safer and cleaner option for use in small or enclosed spaces.
Tools Required for Manual Tile Removal:
To remove tiles manually you will need the following items:
Chisel: To break up the tiles into smaller pieces.
Hammer: To also assist with breaking up the tiles.
Pry bar: To lift and remove the tiles.
Protective gear: It is important to wear goggles, gloves, ear plugs and a face mask to protect yourself from dust and debris during the removal process.
Optional: An air electric jackhammer instead of a hammer and chisel to break up the tiles more quickly and easily.
Optional: A floor scraper to more easily remove left behind or stubborn grout and tile.
7-Steps To Successful Manual Floor Tile Removal
To manually remove floor tiles, you can’t go wrong if you follow these 7 steps:
First, gather the necessary tools and put on your protective gear such as goggles, gloves and face mask.
Clear the area of any furniture or other obstacles and cover any areas that you don’t want to remove tiles from with plastic sheeting or drop cloths.
Begin by breaking up the tiles with the chisel and hammer or jackhammer. Start at a corner of the tile and work your way outward, chipping away at the tile until it is broken into small pieces.
Once the tiles have been broken into smaller pieces, use the pry bar to lift and remove them. Be sure to work carefully to avoid damaging the subfloor beneath the tiles.
If any stubborn pieces of tile or grout remain you can use your chisel and hammer or floor scraper to remove them.
Once all of the tiles have been fully removed, use a broom or dustpan to clean up any debris.
Finally, inspect the subfloor for any damage and make any necessary repairs before installing new flooring.
How To Remove Floor Tiles With A Ride On Floor Scraper
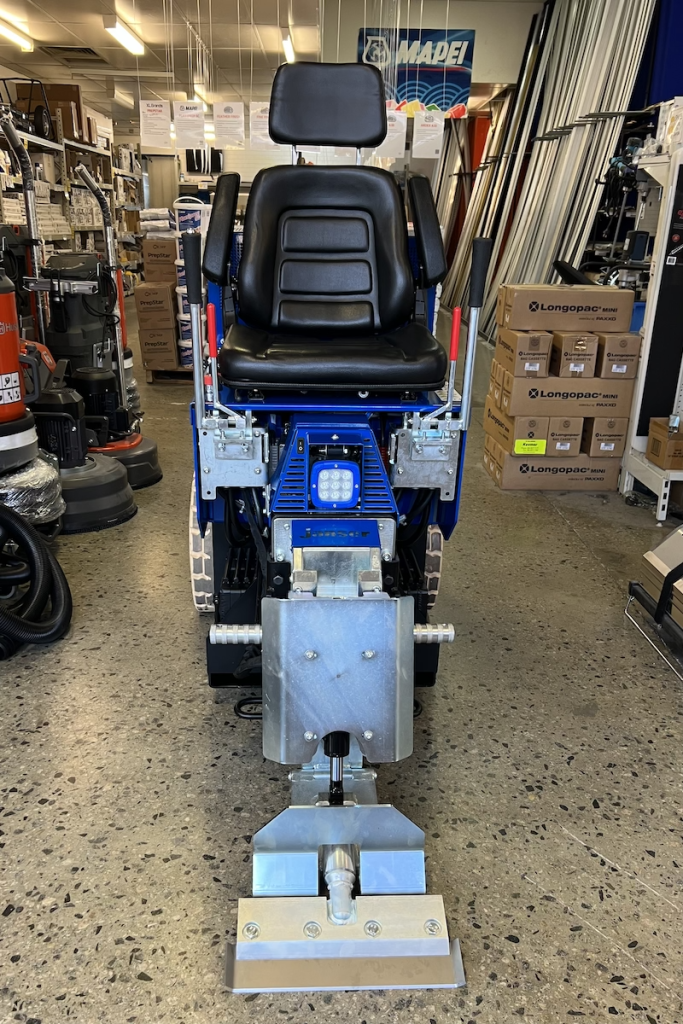
What Is A Ride-On Floor Scraper?
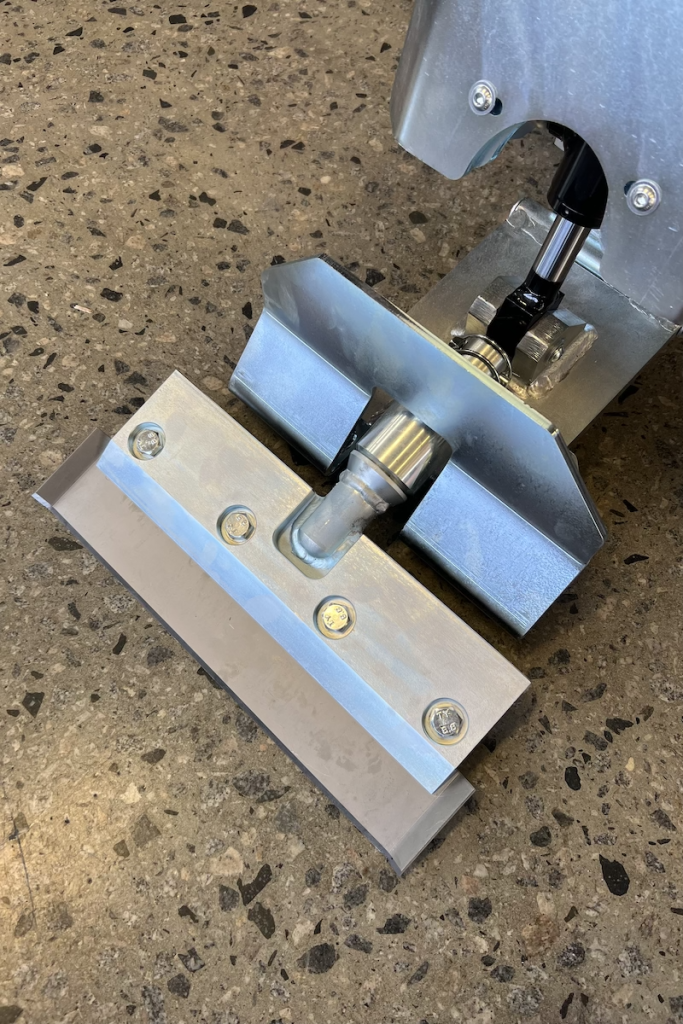
An electric ride-on floor scraper is a specialised, high powered machine equipped with a large blade, carbide shank or chisel to remove tiles. Far more efficient than manual removal, these powered floor scrapers are suitable for large flooring removal projects as it can cover a large area in a short amount of time and is more efficient than manual methods.
The blade is used to cut through and separate the flooring material from the subfloor which can then be cleared away.
Ride-on floor scrapers are often used in commercial and industrial settings to remove large areas of flooring quickly and efficiently. They can also be used in residential settings for removing flooring in larger areas like open plan kitchen, living and dining room configurations.
Advantages of Using a Ride On Floor Scraper
There are several advantages to using a ride-on floor scraper:
Speed: A ride-on floor scraper can remove tiles or other flooring materials far more quickly than manual methods, making it ideal for large flooring removal projects.
Efficiency: A ride-on floor scraper can cover a large area in a short amount of time, making it a more efficient option for removing flooring from large spaces.
Power: A ride-on floor scraper is equipped with a powerful blade that can easily cut through and remove even the toughest flooring materials.
Safety: A ride-on floor scraper can be safer to use than manual methods, as it allows the operator to remain seated while removing the flooring, reducing the risk of injury from repetitive bending and lifting or flying debris.
Tools Required For Removing Tile With A Ride-On Floor Scraper
To use a ride-on floor scraper, you will need a few tools in addition to the machine itself. Here’s all the tools, including the ride-on machine.
A ride-on scraper: This heavy-duty machine is designed specifically for tile removal and can be rented or purchased from a construction equipment specialist company such as Kevmor.
Personal Protective Equipment (PPE): You should always wear safety glasses, earplugs, and a dust mask to protect yourself from dust and debris. View our Safety Equipment Supplies at Kevmor.
A wet/dry vacuum or broom and dustpan: This will help you to clean up any debris after the tile removal is complete. View our Kevmor Commercial Vacuums & Dust Collectors.
KEVMOR TRADESMAN’S TIP Make sure the ride on machine is fully charged the day/night before the job. They take 8 hours to fully charge. Also, bring a spare blade with you to ensure the job does not get held up.
How To Operate A Ride-On Floor Scraper In 10 Steps
Here are the 10 steps for using a ride-on floor scraper to remove tiles:
Begin by preparing the work area. Clear the area of any furniture or other obstacles and cover any areas that you don’t want to remove tiles from with plastic sheeting or drop cloths.
Make sure the ride-on floor scraper is in good working order and that it has been properly maintained.
Put on your PPE gear such as the AIR+ Disposable P2 Mask (world’s first disposable mask with exhalation valve, exclusively available at Kevmor!), before you start your work.
Position the ride-on scraper in the area where you need to remove the tiles.
Start the engine and engage the blade.
Begin by running the machine over the tiles at a slow speed, letting the blade do the work of scraping the tile from the surface.
As you work, use the wet/dry vacuum or broom and dustpan to clean up debris.
Work your way across the entire area, taking care to avoid damaging the substrate.
Once you have finished removing the tiles, use a damp rag to clean up any remaining dust or debris, and let the area dry completely.
Inspect the substrate for cracks or holes that may need to be filled before installing new tiles or flooring.
KEVMOR TRADESMAN’S TIP Machine removal of tiles creates a high volume of debris in a short amount of time, always ensure you have enough additional labor to remove the debris from the area so you can continue to be productive.
Removing Tile On Large Commercial Projects?
Sometimes on commercial projects with a large floor area you will need to release the tension in the adhered ceramic tiles to make the job more efficient. This can be done by first using the ride on to scrap diagonally across the entire floor area and then if required vertically as well (refer diagram below) before continuing to scrape as normal.
Keep in mind that a ride-on scraper is a powerful machine and can cause damage if it’s not operated properly. Be sure to read and understand the operator’s manual before starting the job, and be prepared to spend some time practicing with the machine before you begin the tile removal.
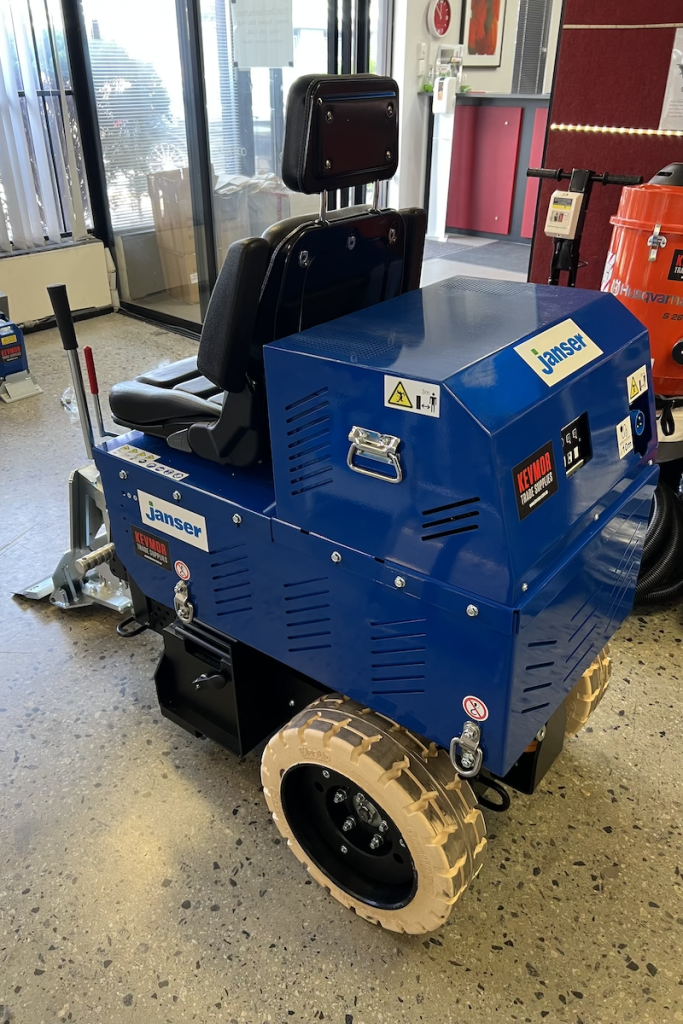
The Janser Ride On ADB Floor Scraper is a powerhouse ride on floor scraper perfectly suited to removing floor tiles on commercial or large scale jobs with ease. With a run time of 8 to 12 hours depending on the flooring material this German made ride on can strip 61m of flooring per minute making it at least 30% more effective than other models.
Another option is the Junior Ride on Floor Scraper, this smaller more compact ride with continuous run time just plug in and go, easily fits through standard doorways and is light enough to be transported in a lift in buildings with multiple levels. It can strip 37m of flooring per minute.
Janser Junior Ride on Floor Scraper at Kevmor
At Kevmor we prefer Janser Germany floor scrapers for several reasons, including:
Travel speed
Battery performance (run time)
Computerised optimal charging system
Powerful hydraulic wheel motors
Precision hydraulic drive controls
Fully adjustable vertical and horizontal
Blade adjustment for faster productivity
Stay Safe While Removing Floor Tiles
It is important to be careful and wear protective gear, such as goggles and gloves when removing floor tiles no matter which method you use. The process creates a lot of dust and debris that can be harmful if inhaled or if it comes into contact with your skin.
It is also important to be mindful of any electrical outlets or pipes that may be located beneath the tiles on walls and floors including covered outlets that have been covered over that you may not be aware of.